2-Tone Step Pergola Kit w/Radius Roof Mirroring Pavers

People are most comfortable when they are in surroundings and with people they feel the most connected to.
We have what are called mirror neurons that “mirrors” the behaviors of others, unconsciously matching other’s emotions. We anticipate others movements —especially when we are on the “same side”, in sympathy or agreement with each other. When we are listening or the one telling a story people mirror each other’s brain activity —both participating in the communication conundrum —as though the observer is acting, too.
The human creation is a social being whose soul is nurtured even by the simplest of gestures —it can be fueled by the twinkle of the eye, a "good morning" in the hallway, even in the hint of a smile. No matter how hard-pressed a day is, even the smallest of trivial courtesies can lighten or kindle an appreciative heart.
Being awake to the little things is fundamental to more fully experience life in all of its glorious beauties. It is also that kind of paying attention to every detail —even on the smallest scale— that makes ShadeScape® shelters: architectural masterpieces.

The little things that make a huge difference!
Attention to the details — the so-called "little things" —are also very important to us in the building of these old-world architectural masterpieces —arbors, gazebos, pavilions, pergolas, trellises, trusses and other timber frame structures.
The above pergola was designed by Design Consultant Dave Bunker and is an 8000 series Step ShadeScape® kit that measures 8' x 19.5' on the upper level and 17' x 19.5' on the lower level.
When taking in view of a MASSIVE scale ShadeScape® arbor, gazebo, pavilion, pergola or trellis it can be easy to gloss over the "little" fine points — all those specifics and technicalities that form the whole. Today, we'll take a look at some of the details of this featured DIY pergola kit to give you an intimate view of the patience and care that goes into these great wood-to-wood connected outdoor living shade shelters.
8000 Series ShadeScape® Step DIY Pergola Kit

Two-Tone DIY Pergola Kit
Two tones of color are often used to give light, dark, dimension or depth to an outdoor shade shelter. Color is also one of the best elements to direct attention to a specific area as you can see in the example here —an Alpine white custom ShadeScape® pergola kit topped with an Ebony stained roof.
At times, we also utilize color to blend in with the surroundings or to soften an area we don't want to be the center of attention as was the case with today's featured ShadeScape® attached pergola kit.

2-Tone ShadeScape® #CustomPergolaKit

The 9' 6" area where the pergola attaches to the home has a UV protective stain finish that custom matched to the exterior finish of the home. This gives it a subtle protective covering.

The color that matched the house created a wider an more open feel along with an illusion of extra height while standing beneath it.

The psychology of color can be a complicated field of study. But combining colors for a particular desired effect is easy to do. While more are likely to select a color that matches the primary color or complimenting elements of a home or business. Here our ShadeScape® family decided to throw a completely different color into the mix —Wild Olive. This ShadeScape® family made a great decision. Wild Olive gave it magnitude and greater interest in the harmony.
Wild Olive is one of the most restful colors to the human eyes and strongly emits an emotional feeling of safety, self-reliance, youthfulness, restoration, loyalty, dependability, calming, generous, lover of nature, practicality, nurturing, and playfulness.
*As a side note: We get more compliments from ShadeScape® family's who have the Wild Olive stain because of the glow, and vibrance of colors it seems to reflect in night lights.

Wild Olive #DIYPergolaKit
Examples of Two-Tone Pergola, Gazebo, and Pavilions
The undertone, intensity, blush and play with color combinations is all part of the many details that Western Timber Frame™ offers to build a shelter that is personal and delightful to the senses.
Each individual is unique in their response to color, whether it is subconsciously or emotionally. Color can evoke a particular mood, speak a language not spoken in words. It can inspire us to experience joy, even awe combined with massive oversize timber shelters. You can check here for more premium stain color choices.
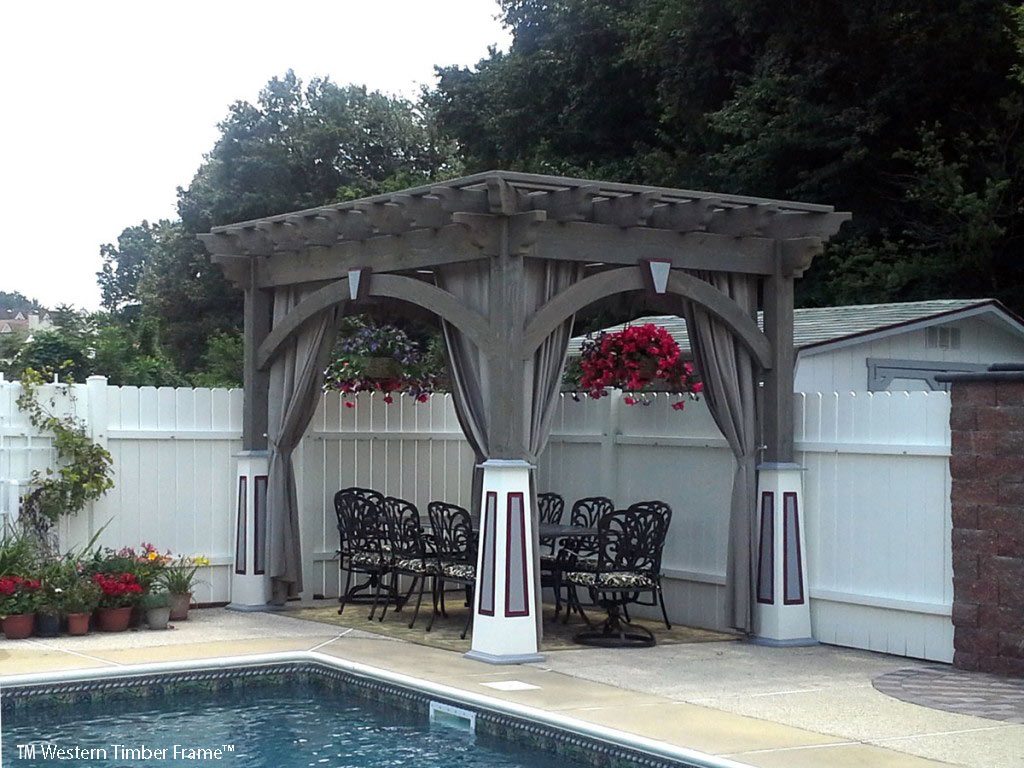
#MultiStainPergolaKit
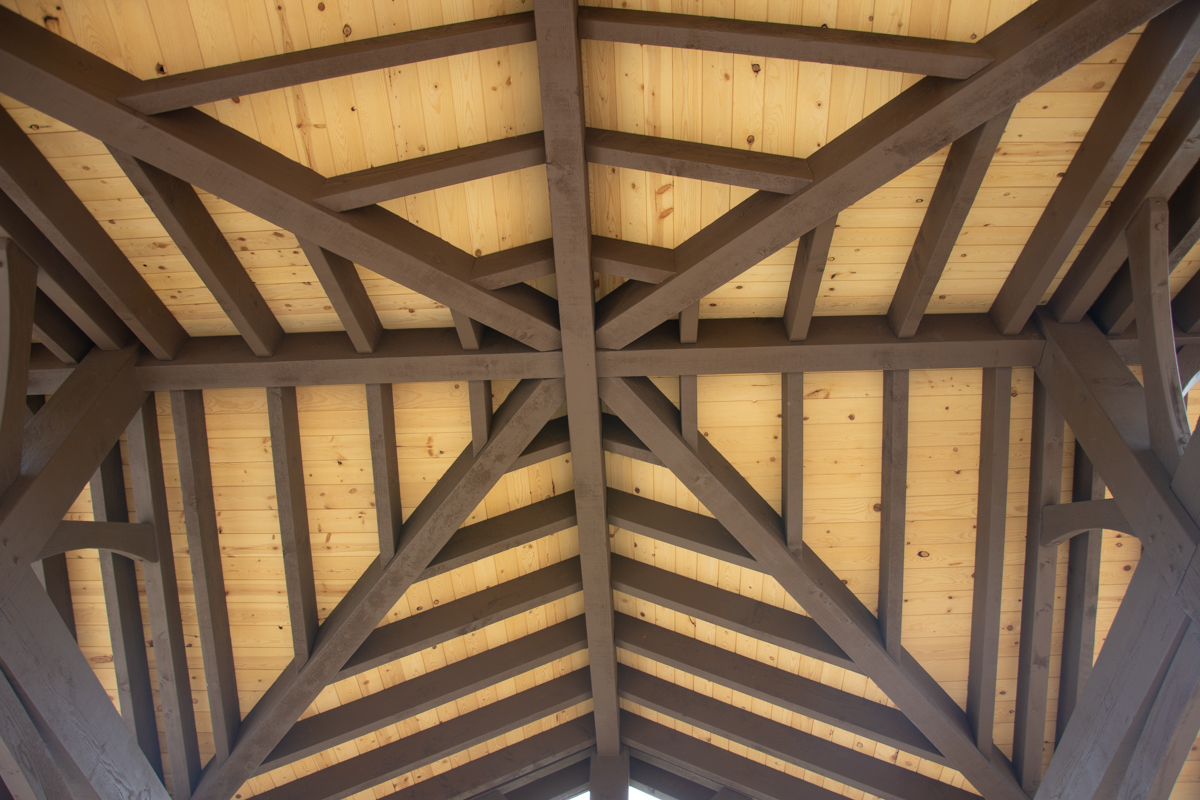


Step Attached Pergola

Here the pergola steps up to give clearance over the established porch and steps.
Standing on the lawn and and viewing the shade shelter from the front, it is difficult to see that the pergola is terraced up, and steps down mirroring the steps below.
Tiered shade coverings are the combining of levels placed one above the other creating beautiful step patterns. The differential geometrical designs creates a delightful show of transitioning sunlight and shadow pattern changes throughout the day.
Examples of Tiered or Step Pergolas and Pavilions
A step roof adds a luxurious feel that is not only captivating to the eyes but it makes an impressive, bold statement. The extra ornamental features and added structural details add an aesthetic quality and that extra element of beauty.
If you are covering the part of a front facade or entryway that has steps or an extra high window or doorway often a step pergola or pavilion is the way to go. This is because there is a sweet spot where you obtain the most sun-to-shade ratio and stepping the shelter down will extend the best overall comfort.
Architecture does influence the way we feel. Materials used in construction, the space, light, design, and geometrical shape all combined to create the perfect architectural masterpiece.


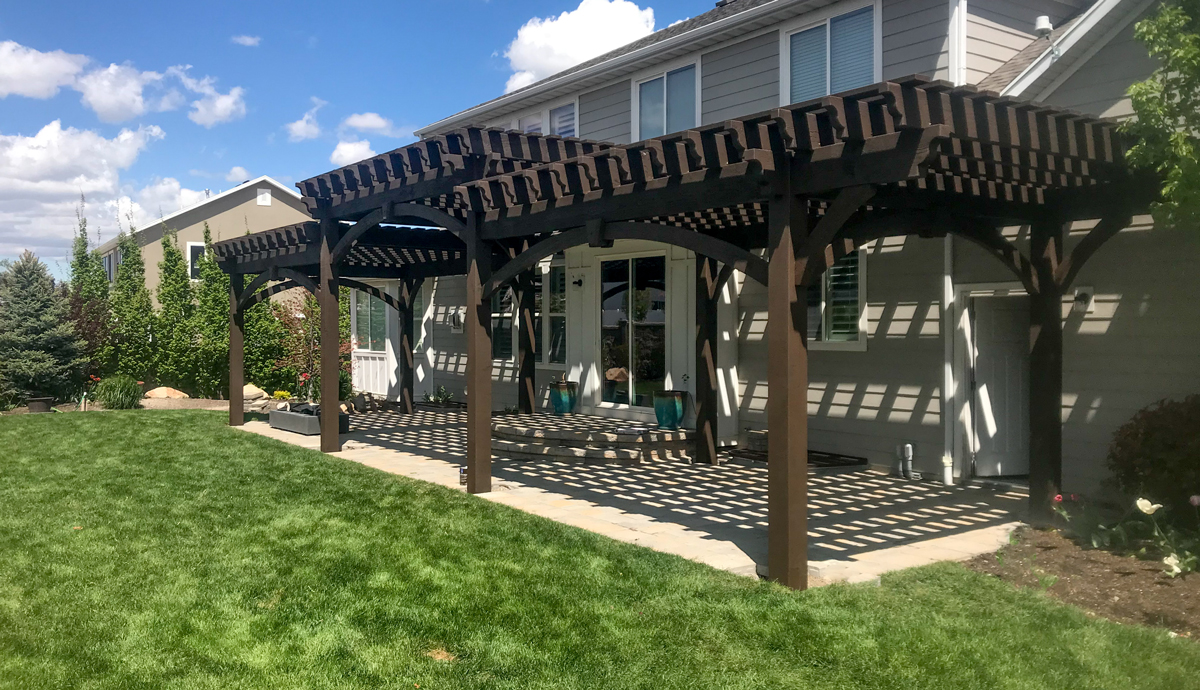

DIY Pergola Kit With Radius Roof

The roof has a slight curve that mirrors the pavers below. The human spirit has always enjoyed the unique, the surprising, something new to delight and awaken the mind. In the 21st Century technology has paved the way for free-spirited architects to easily expand beyond the rules of the vernacular architecture and allow for more specialized design ideas.
Your judgment in style and taste, and how you want to use your backyard, is what matters most in preparing to design a functional landscape. The timber frame pergola kit —ever so slightly— mirrors the curvature of the paver patio. It is beautifully subtle —but just enough the give it that bonus eye-pleasing and artistic curvature to this outdoor living room.
Examples of Curved, Inverted & Radius Style Pavilions & Pergolas


In every conceivable human experience, circles and curves are omnipresent, from the sun, moon, stars, to the eyes that give us vision. Nature is filled with curvilinear shapes. The human brain has an inherent emotional attachment to curved lines which tends to give them a higher beauty-rating.
Some studies conclude that most humans are deeply engrained to prefer curved shapes over angular shapes. However, when taking a look at the semantics the word aesthetic has two principle variables, composition, and complexity.
Included are sub-variables such as order, symmetry, balance, proportion, and variety, etc. The concurrence of architectural literature the most appealing aesthetic experience prefers toned-down levels of complexity with and higher levels of composition. On this premise, combining curves with straight lines usually offers the best in favorable aesthetics.
If you are looking for ideas to add to your ShadeScape® design composition check out our gallery or news section for more curved, inverted or radius style shade shelters.
TimberVolt® Inferno Power Pergola Post —Enjoy the Night Outdoors!

Western Timber Frame™ outdoor wood arbors, gazebos, pavilions, and pergolas can be pre-drilled with a hole down the center of one post to accommodate any and all of your outdoor power electrical and lighting needs.
The TimberVolt® Power series has an electrical chase drilled from one-half to the entire length of the pergola post to hide and protect all the wiring. The recessed boxes feature weatherproof outdoor covers for plugs and switches that seamlessly incorporate into the actual timber pergola post itself. This means there are no running cords and exposed wiring.
On this pergola, the homeowners opted for an Inferno Model TimberVolt® Power post.
FEATURES of the Inferno Model TimberVolt® Power Pergola Post:
• Male plug with upgraded weather cover • One GFI for your protection with upgraded weather cover • Upgraded weather covers • One upper TV plug with two USB plugs • One double switch on top for lights • One separate double switch on top for fan • Integrated USB outlets
The Inferno TimberVolt® Model is Ideal for: Charging your smartphones, tablets, and other USB devices, while you watch movies on your outdoor TV that is plugged into one of the main electrical receptacles up top.

Custom steel insert on top to protect the wiring or water lines from being punctured from lags and hardware fasteners throughout the installation process. And, includes an electrical box on top with two electrical receptacles to prevent water and debris from going down inside the pergola post. This also provides excellent access for lights, fans and other accessories at the roof.
ADDING THE INFERNO MODEL TO A PERGOLA KIT WILL MAXIMIZE A FAMILY'S BACKYARD LIVING EXPERIENCE.
Examples of Pergolas and Pavilions with TimberVolt® Power Posts
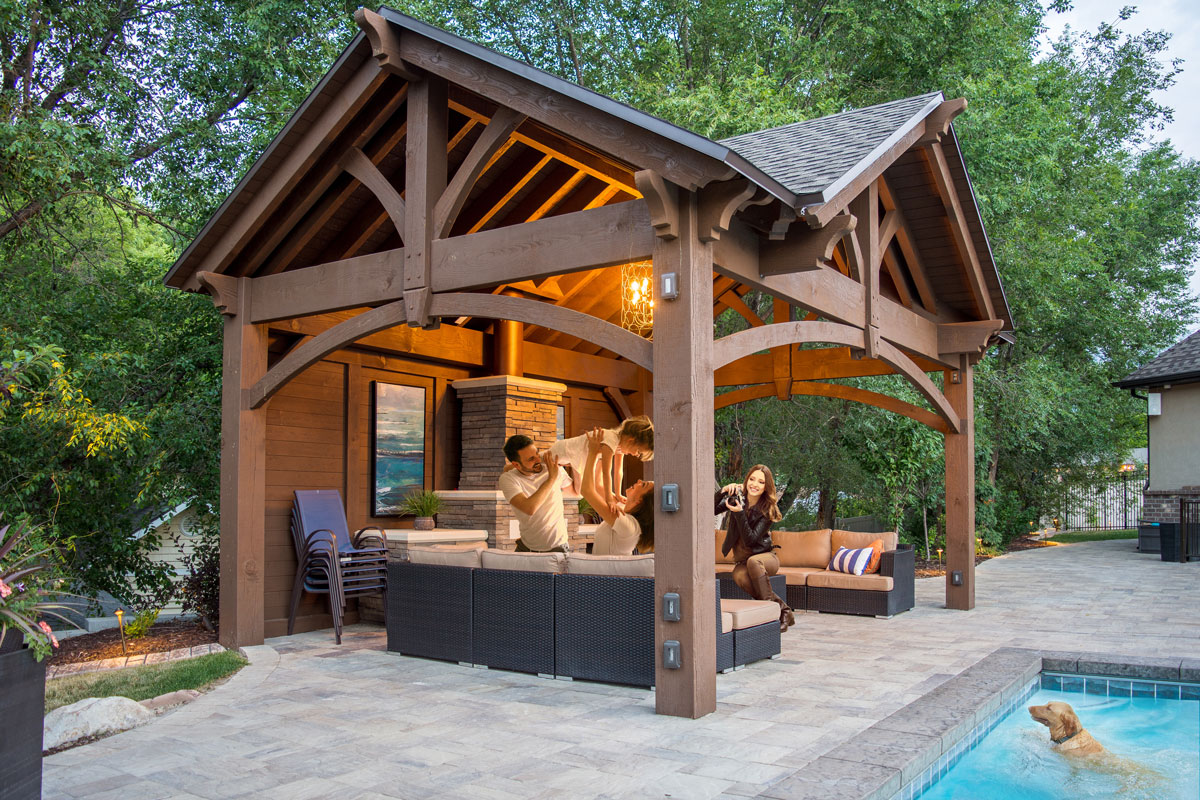


Many people are fascinated by the TimberVolt® electrical post and are intrigued as to how we drill a hole through the entire length of such a long post but there is a hidden complexity in those "little things" that make up the details of these massive timber structures.
“Do you just drill it with a long drill bit?” “Do you just bore it out?”
The simple answer is Yes!
But the actual process is pretty fascinating and requires a great deal of skill from an experienced timber wright craftsman and requires highly specialized proprietary equipment to “drill a hole” through the entire length of a heavy timber pergola post.
How the TimberVolt® Pergola Post Series is Prepped for Power
1. Cut The Timber Pergola Post to Length
First, a timber wright will cut the pergola post to length and carve out the required dovetails. Each pergola post is cut by an experienced Western Timber Frame™ timber wright using large beam saws or oversized chop saws.
2. Carve Out Electrical Boxes
The placement of each electrical box is then marked out by hand. After the boxes are marked by the timber wright, each electrical box is carved out by hand using a special tool called a chain mortiser. Cutting out each electrical box takes between 7-45 minutes. The time varies widely depending on how many knots are present in each pergola post, although the average time to carve out each electrical cavity is about 30 minutes.
3. Drilling the Power Core
Now that the boxes are in place, the timber wright is ready to drill the power hole through the core of the timber pergola post.
The timber wright then measures and marks a center mark at the bottom and the top of the pergola post in the center of the post. Then, using a set of proprietary guide jigs that are sized to either 6″, 8″, 10″, or 12″, the pergola post is secured in place. Then, starting from the bottom, the heavy timber pergola post is then drilled with a custom-made high strength horizontal bore drill. The drill bit itself is hollowed out to allow pressurized air to be fed down the length of the shaft to blow out wood chips and sawdust that is created as the core of the pergola post is bored out to make way for the electrical wiring.


The heavy, hollow-core drill has to be drilled and drawn out between 20 to 40 times to keep the drill bit from becoming lodged inside the pergola post. However, on longer pergola posts, or when knots are encountered, it can easily surpass 100 separate drill strokes to complete the process. This is a time-consuming process that is aggravated each time the bit encounters a knot in the pergola post. Each of these hard knots can take 15-30 minutes for the bit to drill through.
Many times the timber wright is only able to progress 1/2″ with each pass into the pergola post, and even less when knots are encountered. Compressed air is continually forced down the shaft of the bit to remove sawdust and wood chips with each stroke of the drill. Care must be taken to ensure that all sawdust and chips are removed or else the long drill bit can get stuck inside of the pergola post. If the bit does become stuck in the pergola post, then attempting to extract it can render the pergola post unusable.
The natural grain and knots that are in each post effect the path of the drill bit as the hole for the electrical wire is bored out. As the pergola post is bored out, the long drill bit tends to want to follow the natural grain. This causes the shaft of the long drill bit to drift off the center of the pergola post. If the grain in the pergola post has a sharp drift, there is a danger that the hole would drift from the center of the pergola post and exit through the side of the pergola post instead of boring out the middle.

The timber wright must take great care to not allow the bit to bore out the side of the pergola post. As the bit gradually bores out the access hole it eventually encounters the electrical box cavities that were first carved into the pergola post. The timber wright carefully guides the bit through each of these electrical box cavities. These cavities are a good visual aid for the timber wright to assess if the drill is staying in the center of the pergola post.
Once the pergola post has been drilled approximately halfway through, the timber wright carefully backs the boring drill bit back out of the pergola post. He then removes the pergola post from the guide jigs. On the Firefly upper and lower model, the access hole is now complete as they only require drilling an electrical chase halfway through this intense process. For these models, the pergola post is then removed from the guide jigs. It is now ready to install electrical boxes and access covers.
The posts on the Phoenix, Dragon, and Inferno models have only half of the electrical power access holes they need. Therefore, the timber wright will then need to turn the pergola post around to drill the other side and secure it back into the guide jigs. The process is then started again to complete the process of boring a hole in the timber pergola post. Drilling the pergola post’s electrical hole from both directions helps decrease the chances of the bit drifting off center.
NOTE: Despite the care taken by the timber wright, sometimes the drill will still end up breaking through the side of the pergola post rendering the post unusable. The timber wright is then forced to start the process over and an expensive pergola post is now discarded.
Once the timber wright has completed this process, the pergola post is then removed from the guide jigs and is now ready for wiring. Each half of the pergola post takes between 30-45 minutes to drill but can take more time if hard knots are encountered in the process of drilling the pergola post. Thus, each pergola post takes an average of 90 minutes to drill the hole the entire length of an eight-foot-long post. Every foot over eight feet adds approximately 15 minutes per foot and greatly increases the risk of the hole blowing out the side of the post. The post is then sent through the staining process and stained.
4. Installing the Electrical Boxes & Wiring Protection Sleeve
Electrical boxes are secured into each electrical box cavity in the timber pergola post.
Each box is constructed from thermoplastic to resist rust and will not conduct electricity. Each box also meets NEMA OS-2 and is fire rated and UL listed for safety (classified for 2-hour fire wall and/or fire ceiling box). The Dragon model has a horizontally mounted outdoor rated electrical box secured to the top of the pergola post.
Then, a 12″ steel protection sleeve is installed in the core just prior to the wiring process. The protection sleeve is put in place to ensure the wire is protected when lags or screws are used in the pergola post during installation.
5. Installing Electrical Wire, Switches, and Electrical Receptacles & Covers
The pergola post is then wired with a UL listed proprietary main wire that is designed and rated for outdoor use. Each wire is individually insulated and a double layer of protection is provided by an all-weather vinyl jacket that is chemical, oil, and moisture resistant. Each of the electrical blades is reinforced to help prevent accidental bending or breaking.
The fish tape is fed through the pergola post and attached to the wire, which is then carefully drawn through the core of the pergola post to each corresponding electrical box. Once the wire is in place, the finish wiring is then completed on each electrical receptacle and switch, as well as the male plug when applicable.
Outdoor rated electrical covers are then secured over each plug and switch. Each cover is sealed with a synthetic gasket to protect it from the elements.
We use a Hubbell ML450Z Weatherproof, Expandable, Flat, In-Use Plastic Device Cover on the Dragon model. It is an extremely flexible outdoor rated cover that features 16-in-1 configurations. Revolutionary patented design expands from 1″ to 3.5″ to meet your while-in-use needs. Each of these covers is made from an ultra-rugged polycarbonate and synthetic neoprene rubber. It is sealed with a synthetic gasket.
6. Testing The Finished TimberVolt® Pergola Post
At this point, a final test is made of all electrical components. Each switch and plug is tested to ensure that it functions properly. The pergola post is then ready for installation. Once it is installed as part of outdoor living space, the male plug can be simply plugged into an extension cord, generator, or permanently connected to a power supply.

As in this old poem, "Little Things" written by Julia Carney in 1845 — it is the little things that help to make a BIG impression.

Little Things
Little drops of water Little grains of sand, Make the mighty ocean, And the pleasant land.
So the little moments, Humble though they be, Make the mighty ages Of eternity.
Julia Carney, 1845
Small details, such as stepping down over the steps and on the front the radius roof that —ever so slightly— mirrors the curvature of the paver patio. Also, where the pergola attaches to the home the timber is stained to compliment the home —beautifully subtle —and yet it is a two tone pergola. Those extra "little details" are what make ShadeScape® pergolas a place where people want to connect, and where they feel at home.



Leave a Comment